
Whether you’re a coach, athlete, or event official, knowing how to measure shot put effectively is essential for ensuring fairness and accuracy in competitions. Shot put is not just about strength it’s also about technique, consistency, and precision. And without proper measurement, even the best throws lose their value.
In this comprehensive guide, we’ll walk you through the step-by-step process of measuring shot put throws, explore the rules laid out by governing bodies like World Athletics, and offer actionable tips to improve your accuracy and confidence. Whether you’re setting up a school meet or officiating a national-level event, this article is your go-to resource.
Understanding the Basics of Shot Put
Before diving into measurements, it’s essential to grasp the fundamentals of the sport.
What is Shot Put?
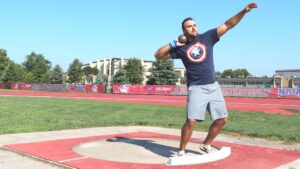
Shot put is a track and field event where an athlete “puts” (throws) a heavy spherical object called a shot from a designated circle. The goal is to propel the shot as far as possible within a 34.92° sector without stepping out of the throwing circle.
Standard Shot Put Dimensions
- Men’s shot weight: 7.26 kg (16 lbs)
- Women’s shot weight: 4.0 kg (8.8 lbs)
- Throwing circle diameter: 2.135 meters (7 feet)
- Landing sector angle: 34.92 degrees
Knowing these dimensions helps ensure accurate setup and measurement compliance.
Equipment Needed for Measuring Shot Put
Essential Tools
To measure shot put throws effectively, you’ll need:
- Steel measuring tape (minimum 30 meters): For long-distance accuracy.
- Plumb bob or laser pointer: To find the shortest distance to the center of the circle.
- Chalk or marker: To indicate the point of landing.
- Clipboard and recording sheet/app: To document measurements.
- Rake and broom: To prepare the landing area for each throw.
Optional Tools for Precision
- Laser distance measurer: Common in professional competitions for quick and accurate reads.
- Surveyor’s tripod: Can be used in combination with laser measurers.
Pro tip: Always check your tools for calibration before official use.
Step-by-Step: How to Measure Shot Put Accurately
Step 1: Confirm a Legal Throw
Before measurement, verify that the throw is legal:
- The athlete stayed within the circle.
- The shot landed within the designated sector.
- The athlete exited the circle from the rear half.
Only legal throws are measured.
Step 2: Mark the Point of Landing
Once the shot lands, pinpoint the closest mark made by the shot in the landing area.
- Use a flag, spike, or cone to mark it.
- Avoid measuring from where the shot rolled measure the first impact point.
Step 3: Position the Tape
- Place the zero end of the measuring tape at the nearest mark made by the shot.
- Extend the tape to the center of the throwing circle.
- Ensure the tape is pulled tight and lies flat on the ground.
Step 4: Measure from the Circle’s Center
Measurements are taken from the inside edge of the circle’s stop board (the front of the circle) directly to the shot’s landing point. If you’re using a plumb bob, drop it from the center of the stop board to align your tape correctly.
Step 5: Record the Measurement
- Measurements should be recorded in meters and centimeters, rounded down to the nearest lower centimeter.
- Double-check and record the number on the official score sheet or app.
Common Mistakes in Shot Put Measurement
Even seasoned officials can make errors. Watch out for these common mistakes:
- Measuring from the wrong point on the stop board.
- Using slack in the tape, which results in incorrect distance.
- Misidentifying the impact point if the ground is soft or uneven.
- Recording the distance before confirming legality of the throw.
Tips for Consistent and Fair Measurement
Maintain a Clear Landing Area
- Rake and smooth the sand or turf after every throw.
- This helps identify the impact point clearly.
Use Markers Strategically
-
Cone markers for sector boundaries help officials and athletes visually stay within bounds.
Train Volunteers and Staff
-
Proper training ensures everyone involved understands the process and the importance of accuracy.
Use Technology When Available
-
Laser measurers reduce human error and speed up competitions.
Rules and Regulations for Shot Put Measurement
All official competitions must follow guidelines set by governing bodies:
World Athletics Rules
- Measure from the closest mark made by the shot to the inner edge of the stop board.
- All throws must land within the sector lines.
- The athlete must not step out of the circle before the shot lands and must exit from the rear half.
High School and Collegiate Variations
- U.S.-based high school and collegiate rules may differ slightly in measurement rounding or recording procedures.
- Always check with your local athletic association or organization for specific guidelines.
Real-World Example: Shot Put at the Olympics
In major events like the Olympics, precision is paramount. Judges often use:
- Laser rangefinders
- High-definition cameras to track shot landing
- Instant replay for appeals or review
The 2020 Tokyo Olympics used cutting-edge tech to reduce human involvement and improve speed, showing the evolution of how we measure shot put at the highest levels.
Conclusion
Mastering how to measure shot put effectively is more than just pulling a tape it’s about understanding the rules, using the right tools, and applying best practices to ensure accurate, fair results. Whether you’re officiating a local school meet or prepping for elite-level competition, attention to detail makes all the difference.
By following the steps outlined in this guide, you’ll be equipped to measure with precision and confidence keeping the integrity of the sport alive and well.