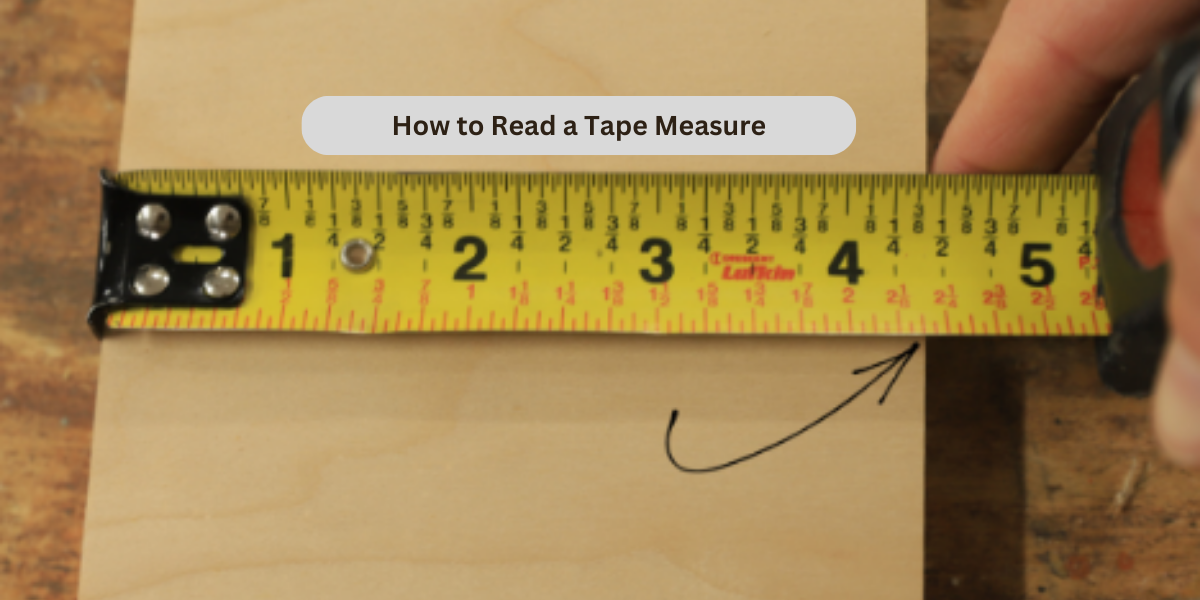
Reading a tape measure might seem simple, but for beginners, it can be a bit confusing with all the lines, numbers, and fractions. Whether you’re tackling a DIY project, measuring for home improvements, or just learning a handy skill, understanding How to Read a Tape Measure is essential. This guide will walk you through the easiest way Tape Measure way to read a tape measure, step by step. By the end of this article, you’ll feel confident and ready to measure like a pro!
Why Learning to Read a Tape Measure is Important
Tape measures are indispensable tools in various fields like construction, wood working, and sewing. Here’s why learning to read one is crucial:
- Accuracy: Precise measurements ensure your projects turn out as planned.
- Versatility: Tape measures work for short and long measurements and are portable.
- Time-Saving: Knowing how to use one properly avoids repeated errors and saves time.
Parts of a Tape Measure
Before diving into how to read it, let’s familiarize ourselves with the main parts of a tape measure:
- Case: The outer shell that holds the tape. It often includes a lock button to hold the tape in place.
- Tape Blade: The extendable strip marked with measurements.
- Hook: The metal end that helps grip the surface being measured.
- Graduations: The lines and numbers on the tape that indicate measurements.
- Belt Clip: Often attached to the case for easy carrying.
Understanding these parts will make using the tape measure easier and more effective.
Measurement Systems on a Tape Measure
Most tape measures use one or both of the following systems:
1. Imperial System (Inches and Feet)
Common in the U.S. and some other countries.
Includes inches (marked with numbers) and fractions (subdivided into halves, quarters, eighths, and sixteenths).
2. Metric System (Millimeters and Centimeters)
- Used worldwide.
- Includes centimeters and millimeters, with every 10 millimeters equaling 1 centimeter.
How to Read a Tape Measure: Step-by-Step
Step 1: Understand the Markings
Inches: Look for the larger, numbered marks (e.g., 1, 2, 3).
Fractions: The smaller lines between inches represent fractions. For example:
- The longest line halfway between two numbers is 1/2.
- The next longest lines are 1/4 and 3/4.
- The shortest lines are 1/8, 3/8, 5/8, and 7/8.
- The smallest lines are 1/16 increments.
Centimeters and Millimeters: On metric tape measures, the numbers represent centimeters, and the smaller lines represent millimeters.
Step 2: Identify the Measurement
- Extend the tape to the desired length.
- Locate the number closest to the edge of the object you’re measuring.
- Count the smaller lines for precise fractions or millimeters.
Step 3: Record the Measurement
- Write down the measurement in the appropriate unit.
- Double-check if necessary to ensure accuracy.
- Common Tape Measure Features to Know
1. Black Diamonds

- Found on some tape measures at intervals of 19.2 inches.
- Useful for framing projects, marking five trusses per 8-foot sheet of plywood.
2. Red Numbers
- Highlighted numbers at 16-inch intervals.
- Indicate standard stud spacing in construction.
3. Hook Adjustability
The hook can move slightly to account for its thickness, ensuring accurate inside and outside measurements.
Tips for Beginners
Practice Makes Perfect: Practice measuring various objects to familiarize yourself with the markings.
- Use the Lock: Lock the tape in place to get stable and accurate measurements.
- Start with Inches: If you’re new to tape measures, begin with the imperial system to master fractions before tackling the metric system.
- Measure Twice, Cut Once: Always double-check measurements to avoid mistakes.
- Keep It Clean: Dust or debris on the tape can obscure markings, so clean it regularly.
Common Mistakes to Avoid
- Misreading Fractions: Always double-check the fraction lines.
- Ignoring the Hook: Ensure the hook is properly aligned with the edge.
- Skipping Practice: Hands-on experience is key to mastering this tool.
Visual Aids and Tools
Including visuals can significantly enhance understanding. Here are some ideas for visuals:
- Annotated Tape Measure Image: Highlight the different parts and markings.
- Fraction Breakdown Chart: Show fractions with corresponding lines for clarity.
- Step-by-Step Infographic: Visualize the measuring process in simple steps.
Conclusion
Learning how to read a tape measure is an invaluable skill that’s easier than it looks. By understanding the markings, practicing regularly, and following this guide, you’ll quickly gain confidence in your measuring abilities. Whether you’re working on a home project or taking up a new hobby, accurate measurements will set you up for success. Now, grab a tape measure and start practicing today!

